Installation Tutorial for Cloud
QuantRocket can easily be deployed to the cloud. Cloud deployments have several advantages over local deployments, especially for live trading:
- your cloud provider's internet connectivity is typically much more reliable than your home internet
- run Docker on Linux, its native platform
- access your cloud deployment securely from any computer
- a dedicated environment for your algos, no CPU/memory resource contention between your algos and your personal computer use
This tutorial will show you how to use Docker to provision a cloud server using any of several cloud providers (Amazon Web Serivce, DigitalOcean, Google Cloud Platform, Microsoft Azure, etc.) and deploy QuantRocket to it.
Install Docker
To run QuantRocket in the cloud, first you need to install Docker on your local computer. You'll use your local installation of Docker to create and control your cloud server.
Follow the instructions below to download and install Docker (Docker Engine, Docker Compose, and Docker Machine) for your operating system.
Install Docker Desktop
Visit Docker's website and follow the instructions to download and install Docker Desktop , which includes Docker Engine and Docker Compose.
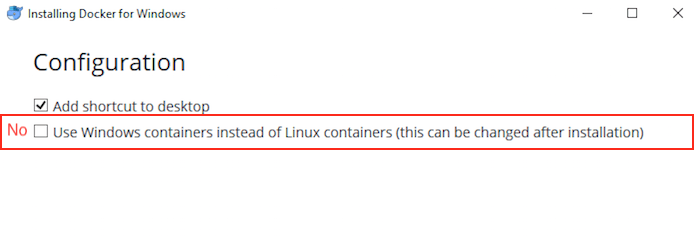
If prompted during installation, do not check the box to use Windows containers. Docker Desktop for Windows can run Windows containers or Linux containers but not both at the same time. QuantRocket uses Linux containers.
After the installation, start Docker Desktop if it isn't already started (Start > Docker).
Install Docker Machine
For cloud deployments you also need Docker Machine. Install Docker Machine using the following commands. (First check the Docker Machine GitHub page and update the version number in the command below if a newer version of Docker Machine is available.)$ # add a bin directory under home directory
$ mkdir -p "$HOME/bin"
$ # download docker-machine
$ curl https://github.com/docker/machine/releases/download/v0.16.2/docker-machine-Windows-x86_64.exe -o "$HOME/bin/docker-machine.exe"
$ # make docker-machine executable
$ ICACLS "$HOME/bin/docker-machine.exe" /grant "users:(RX)"
$ # add bin directory to system path
$ [Environment]::SetEnvironmentVariable("Path", $env:Path + ";$HOME\bin", "Machine")The modified environment variable won't take effect until you restart PowerShell, so close the window now and open a new one.
Install Docker Desktop
Visit Docker's website and follow the instructions to download and install Docker Desktop , which includes Docker Engine and Docker Compose.
Install Docker Machine
For cloud deployments, you also need Docker Machine. Install Docker Machine using the following commands. (First check the Docker Machine GitHub page and update the version number in the command below if a newer version of Docker Machine is available.)
$ LATEST_VERSION=v0.16.2
$ KERNEL=$(uname -s)
$ HARDWARE=$(uname -m)
$ curl -L "https://github.com/docker/machine/releases/download/$LATEST_VERSION/docker-machine-$KERNEL-$HARDWARE" >/usr/local/bin/docker-machine
$ chmod +x /usr/local/bin/docker-machine
Install Docker Engine
Visit Docker's website and follow the installation instructions for your distribution:
When finished, run Docker's hello-world container to verify the installation:
$ sudo docker run hello-worldBy default, you have to use sudo to run Docker. Forgetting to do so can result in confusing error messages, so follow the steps to allow yourself to manage Docker as a non-root user. Verify that it worked by running (without sudo):
$ docker run hello-worldYou may also want to configure Docker to start on boot.
Install Docker Compose
Next, follow the instructions for installing Docker Compose on Linux .
When finished, verify your installation:
$ docker-compose --versionInstall Docker Machine
Then, install Docker Machine :
$ base=https://github.com/docker/machine/releases/download/v0.16.2 && curl -L $base/docker-machine-$(uname -s)-$(uname -m) >/tmp/docker-machine && sudo install /tmp/docker-machine /usr/local/bin/docker-machine
Verify the installation:
$ docker-machine versionCreate Cloud Server
Now that Docker is installed on your local computer, you can use it to create a cloud server with the cloud provider of your choice. In a later step you'll deploy QuantRocket to this cloud server. Follow the instructions below for the cloud provider of your choice.
Follow the tutorial on Docker's website to sign up for an Amazon Web Services account and create an IAM access key and secret access key.
Use Docker Machine to create an EC2 instance:
$ docker-machine create --driver amazonec2 --amazonec2-access-key XXXXXXXXXXXX --amazonec2-secret-key XXXXXXXXXXXX --amazonec2-open-port 80 --amazonec2-open-port 443 --amazonec2-instance-type t2.large --amazonec2-region us-east-1 --amazonec2-root-size 200 quantrocketNote the following options in the above example:
--amazonec2-access-key/--amazonec2-secret-key: replace with your access key ID and secret access key--amazonec2-open-port: open port 443 and port 80--amazonec2-instance-type: select the instance type. The minimum amount of memory for running QuantRocket is 4 GB, but 8 GB or 16 GB is better. The larger the instance, the larger the data analyses you can run.--amazonec2-region: indicate the region where the instance should be created. Choose a region near where you live and/or near an exchange you care about.--amazonec2-root-size: select the amount of storage space on the instance (in GB). 50-100 GB is the minimum, but several hundred GB is better as it will provide space for more data.- Name the instance "quantrocket". The name will be used with Docker Machine and will also appear in the AWS console.
See Docker's website for the full list of available AWS options.
After you create the instance, you'll see it in the AWS console when you log in to your AWS account.
Follow the tutorial on Docker's website to sign up for a DigitalOcean account and generate an access token.
Use Docker Machine to create a DigitalOcean Droplet:
$ docker-machine create --driver digitalocean --digitalocean-access-token=XXXXXXXXXXXX --digitalocean-region nyc3 --digitalocean-size s-6vcpu-16gb --digitalocean-backups --digitalocean-monitoring quantrocketNote the following options in the above example:
--digitalocean-access-token: replace with your access token--digitalocean-region: indicate the region where the server should be created. Choose a region near where you live and/or near an exchange you care about.--digitalocean-size: indicate the size of the Droplet. The minimum size for running QuantRocket is 4gb, but 8gb or 16gb is better. The larger the Droplet, the larger the data analyses you can run. Check out the DigitalOcean API docs for available sizes.--digitalocean-backups: optional but recommended (extra cost)--digitalocean-monitoring: optional but recommended- Name the Droplet "quantrocket". The name will be used with Docker Machine and will also appear in the DigitalOcean user interface.
See Docker's website for the full list of available DigitalOcean options.
After you create the Droplet, you'll see it in the DigitalOcean user interface when you log in to your DigitalOcean account.
You can run QuantRocket on any cloud provider for which Docker Machine provides a driver, including Google Cloud Platform, Microsoft Azure, and others. See the Docker website for the list of supported cloud providers and follow Docker's instructions to create a cloud server with your chosen provider.
Important: Be sure to open ports 80 and 443 on your cloud server.
Setup Domain
Cloud deployments must be accessed via a domain you provide (for example quantrocket.abccapital.com); they cannot be accessed via the IP address of the cloud server. During the deployment process, QuantRocket will obtain an SSL certificate from Let's Encrypt so that you can securely access your cloud deployment over HTTPS. You must provide your own custom domain to use for the SSL certificate.
Use Docker Machine (or the cloud provider interface) to check the IP of your cloud server:
$ docker-machine ip quantrocketLog in to your DNS provider and create an A record that points your custom domain to the IP of your cloud server. For example, if the IP address is 1.2.3.4 and your domain is abccapital.com, you could create an A record that points quantrocket.abccapital.com to IP address 1.2.3.4.
In a subsequent step, you will provide your custom domain (quantrocket.abccapital.com) as the environment variable HOUSTON_DOMAIN. QuantRocket will use this to obtain a SSL certificate from Let's Encrypt for your custom domain.
Download Docker Compose file
To install QuantRocket, download a Docker Compose file which tells Docker how to create the QuantRocket stack. A Compose file is a YAML file that defines a multi-container Docker application.
Open a command line prompt (PowerShell on Windows, Terminal on Mac/Linux).
Create a folder for QuantRocket under your home directory:
$ cd ~
$ mkdir quantrocket
$ cd quantrocket
Copy and paste the following command to download the latest Compose file and save to your computer:
$ curl 'https://www.quantrocket.com/composefiles/latest/cloud/docker-compose.yml' -o docker-compose.yml(You can also download the Compose file from the downloads page.)
Set cloud environment variables
To deploy QuantRocket to the cloud, you must set several environment variables which define the domain and authentication credentials to use for your cloud deployment.
In your Compose file, you'll see a section like the following:
houston:
  image: 'quantrocket/houston:1.4.0'
  environment:
    BASIC_AUTH_USER: '${HOUSTON_USERNAME}'
    BASIC_AUTH_PASSWD: '${HOUSTON_PASSWORD}'
    LETSENCRYPT_DOMAIN: '${HOUSTON_DOMAIN}'
This tells Docker to look for environment variables called HOUSTON_USERNAME, HOUSTON_PASSWORD and HOUSTON_DOMAIN on your computer and pass them to the houston container, QuantRocket's API gateway.
These environment variables serve the following purpose:
${HOUSTON_USERNAME}/${HOUSTON_PASSWORD}: username and password which you'll use to connect remotely to your deployment (choose a strong password)${HOUSTON_DOMAIN}: the custom domain from an earlier step (for examplequantrocket.abccapital.com)
${HOUSTON_USERNAME} and ${HOUSTON_PASSWORD} when running QuantRocket in the cloud. Otherwise, your QuantRocket services will be publicly accessible to anyone with the URL!To set the environment variables, follow the instructions appropriate to the operating system of your local computer (not the OS of the cloud server).
In PowerShell, set the environment variables using the following syntax:
$ [Environment]::SetEnvironmentVariable("HOUSTON_USERNAME", "whateveryouwant", "User")
$ [Environment]::SetEnvironmentVariable("HOUSTON_PASSWORD", "pickastrongpassword", "User")
$ [Environment]::SetEnvironmentVariable("HOUSTON_DOMAIN", "quantrocket.abccapital.com", "User")On Mac, set your environment variables in .profile, which gets executed each time you open Terminal.
$ touch ~/.profile
$ echo 'export HOUSTON_USERNAME=whateveryouwant' >> ~/.profile
$ echo 'export HOUSTON_PASSWORD=pickastrongpassword' >> ~/.profile
$ echo 'export HOUSTON_DOMAIN=quantrocket.abccapital.com' >> ~/.profile
Source the file to make the environment variables available in the current terminal session (not required for future terminal sessions):
$ source ~/.profileOn Linux, set your environment variables in .bashrc, which gets executed each time you open a terminal.
$ touch ~/.bashrc
$ echo 'export HOUSTON_USERNAME=whateveryouwant' >> ~/.profile
$ echo 'export HOUSTON_PASSWORD=pickastrongpassword' >> ~/.profile
$ echo 'export HOUSTON_DOMAIN=quantrocket.abccapital.com' >> ~/.profile
Source the file to make the environment variables available in the current terminal session (not required for future terminal sessions):
$ source ~/.bashrcDeploy QuantRocket
Use Docker Machine to activate the environment you created earlier. Running docker-machine env quantrocket will cause Docker to print the platform-specific command you should run to activate your environment:
$ docker-machine env quantrocket
$ # then type the command docker-machine displays, for example on Linux/Mac:
$ eval $(docker-machine env quantrocket)
After activation, any Docker commands you run will run on your cloud server rather than on your local computer. Now you can use docker-compose to deploy QuantRocket to the cloud server:
$ cd ~/quantrocket
$ docker-compose -p quantrocket up -d
Docker Compose will read your docker-compose.yml, pull the images down from Docker Hub onto your cloud server, and create and run containers from the images. This process takes several minutes. You will see output like this:
Creating network "quantrocket_default" with the default driver
Pulling houston (quantrocket/houston:1.6.0)...
ad74af05f5a2: Pull complete
c1da3f388f16: Extracting [============================================>      ]  110.3MB/125.3MB
3f388f16: Downloading [===========================================>       ]    108MB/125.3MBte
4c2b7a4aefc0: Download complete
e61a44100a50: Download complete
8e960303c169: Waiting
f2a1d6599d9d: Waiting
You can list all the containers that are running on your deployment:
$ docker psCONTAINER ID IMAGE COMMAND CREATED STATUS PORTS NAMES
476bd8607707 quantrocket/history:1.6.0 "/usr/bin/tini -- ..." 37 seconds ago Up 33 seconds 80/tcp quantrocket_history_1
96e93387015c quantrocket/master:1.6.0 "/usr/bin/tini -- ..." 37 seconds ago Up 32 seconds 80/tcp quantrocket_master_1
fc4b87285158 quantrocket/jupyter:1.6.0 "/usr/bin/tini -- ..." 38 seconds ago Up 33 seconds 80/tcp quantrocket_jupyter_1
...You should now be able to access the Jupyter environment in your browser at your custom domain from earlier. For example, if your custom domain is quantrocket.abccapital.com, your deployment URL is https://quantrocket.abccapital.com. You may want to bookmark this URL.
Your browser will prompt you to enter the username and password you set earlier (and will store the credentials so you don't have to re-enter them each time).
docker-compose logs houstonIn JupyterLab you'll see the JupyterLab dashboard. Click the Quickstart button to find an interactive tour and other resources to help you get started with QuantRocket: